Do-It-Yourself Smartphone Video Guide
This is designed to help those who wish to create a " Do It Yourself " smart-phone video that will be used in an ATG Mediaworks Production. Following these instructions will guarantee the best possible video. One may be inclined to bypass some of the instructions here, but following these instructions a closely as possible will help to ensure that your final production, which will include the video you are about to shoot is a high-quality video.
Step 1 - Download the WeTransfer app for IOS or Android
The following links will take you directly to the Apple app store or google play store
Apple IOS

Android

Step 2 - Shooting Your Video
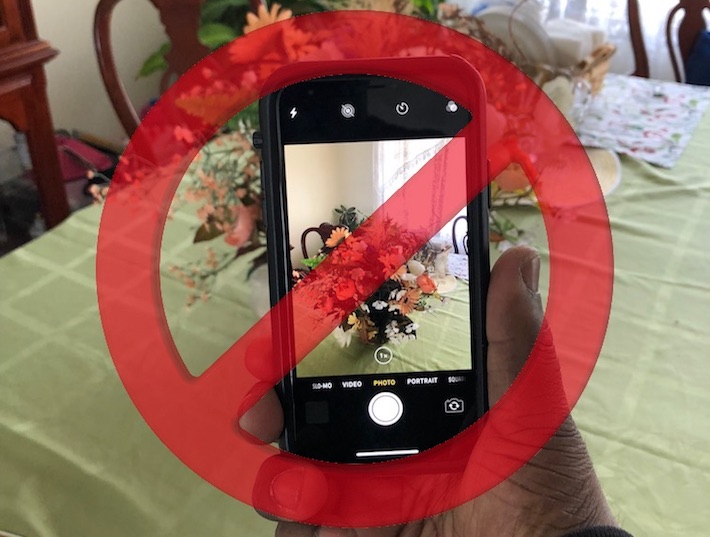
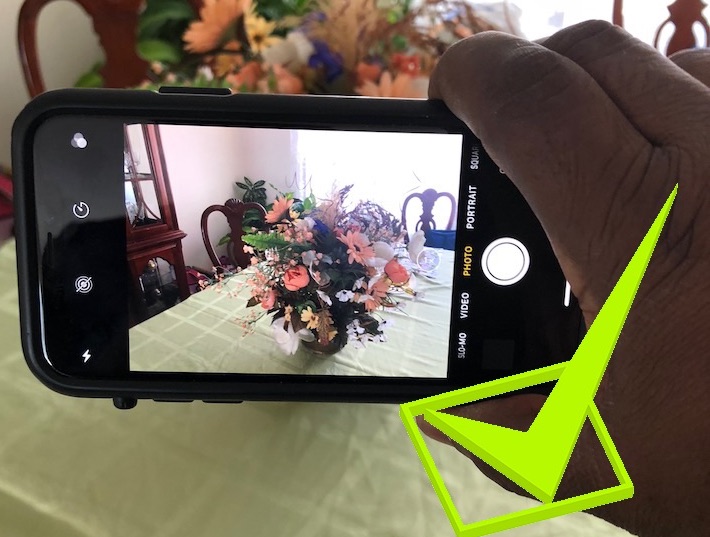
Open your video recording app. The preferred method for the best results is LANDSCAPE. This means that you must turn your phone on its side:
This allows for a nice movie-like appearance of your video.
DO NOT Shoot this way!
Shoot THIS WAY!
- Try to get someone to assist you, as shooting selfie mode in landscape can be somewhat more difficult
- Make Sure that you are in a quiet place, as the video will pick up background noises & conversations.
- Try to make sure that you are in a well lit area. If shooting outside, or in front of a window, please ensure that the light source (or window) is in the SUBJECTS FACE and not at the subject's back. Having the sun or windown at the subject's back will cause their face to be "blacked out"
- Please DO NOT include any background music, special color filters, edits or effects as these will also be added later
Step 3 - Transferring Your Video
For this tutorial, the iPhone interface is used, the Android interface may be somewhat different, but the flow should be similar.
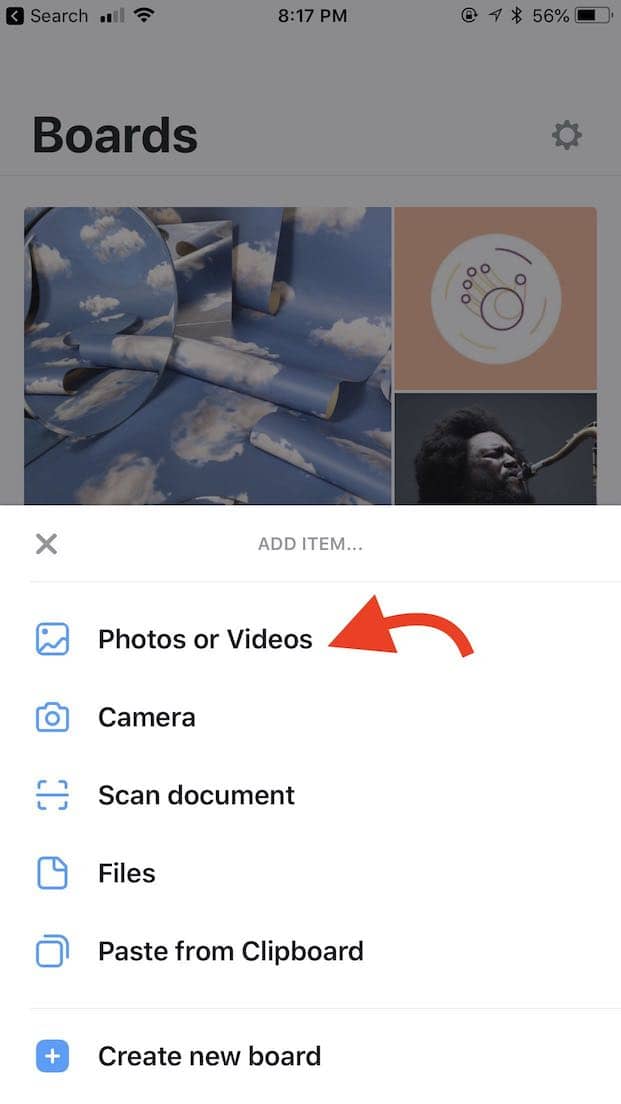
Step 3A - Once you have recorded and saved your video to your camera roll, open the we-transfer app that you downloaded in step 1. You can skip through the in-app tutorials. Once in the app, tap the + button at the bottom of the screen to start the upload process.

Step 3B - Choose "Photos or Videos" from the menu
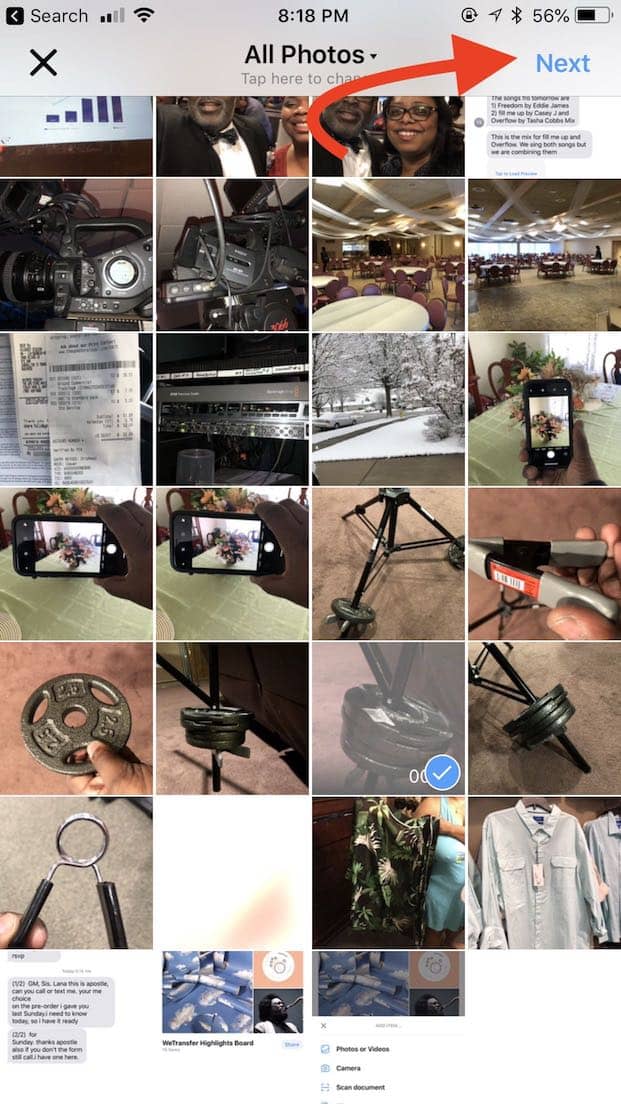
Step 3C - select the video you just recorded, then tap "Next". This step can take some time depending upon the size of your video
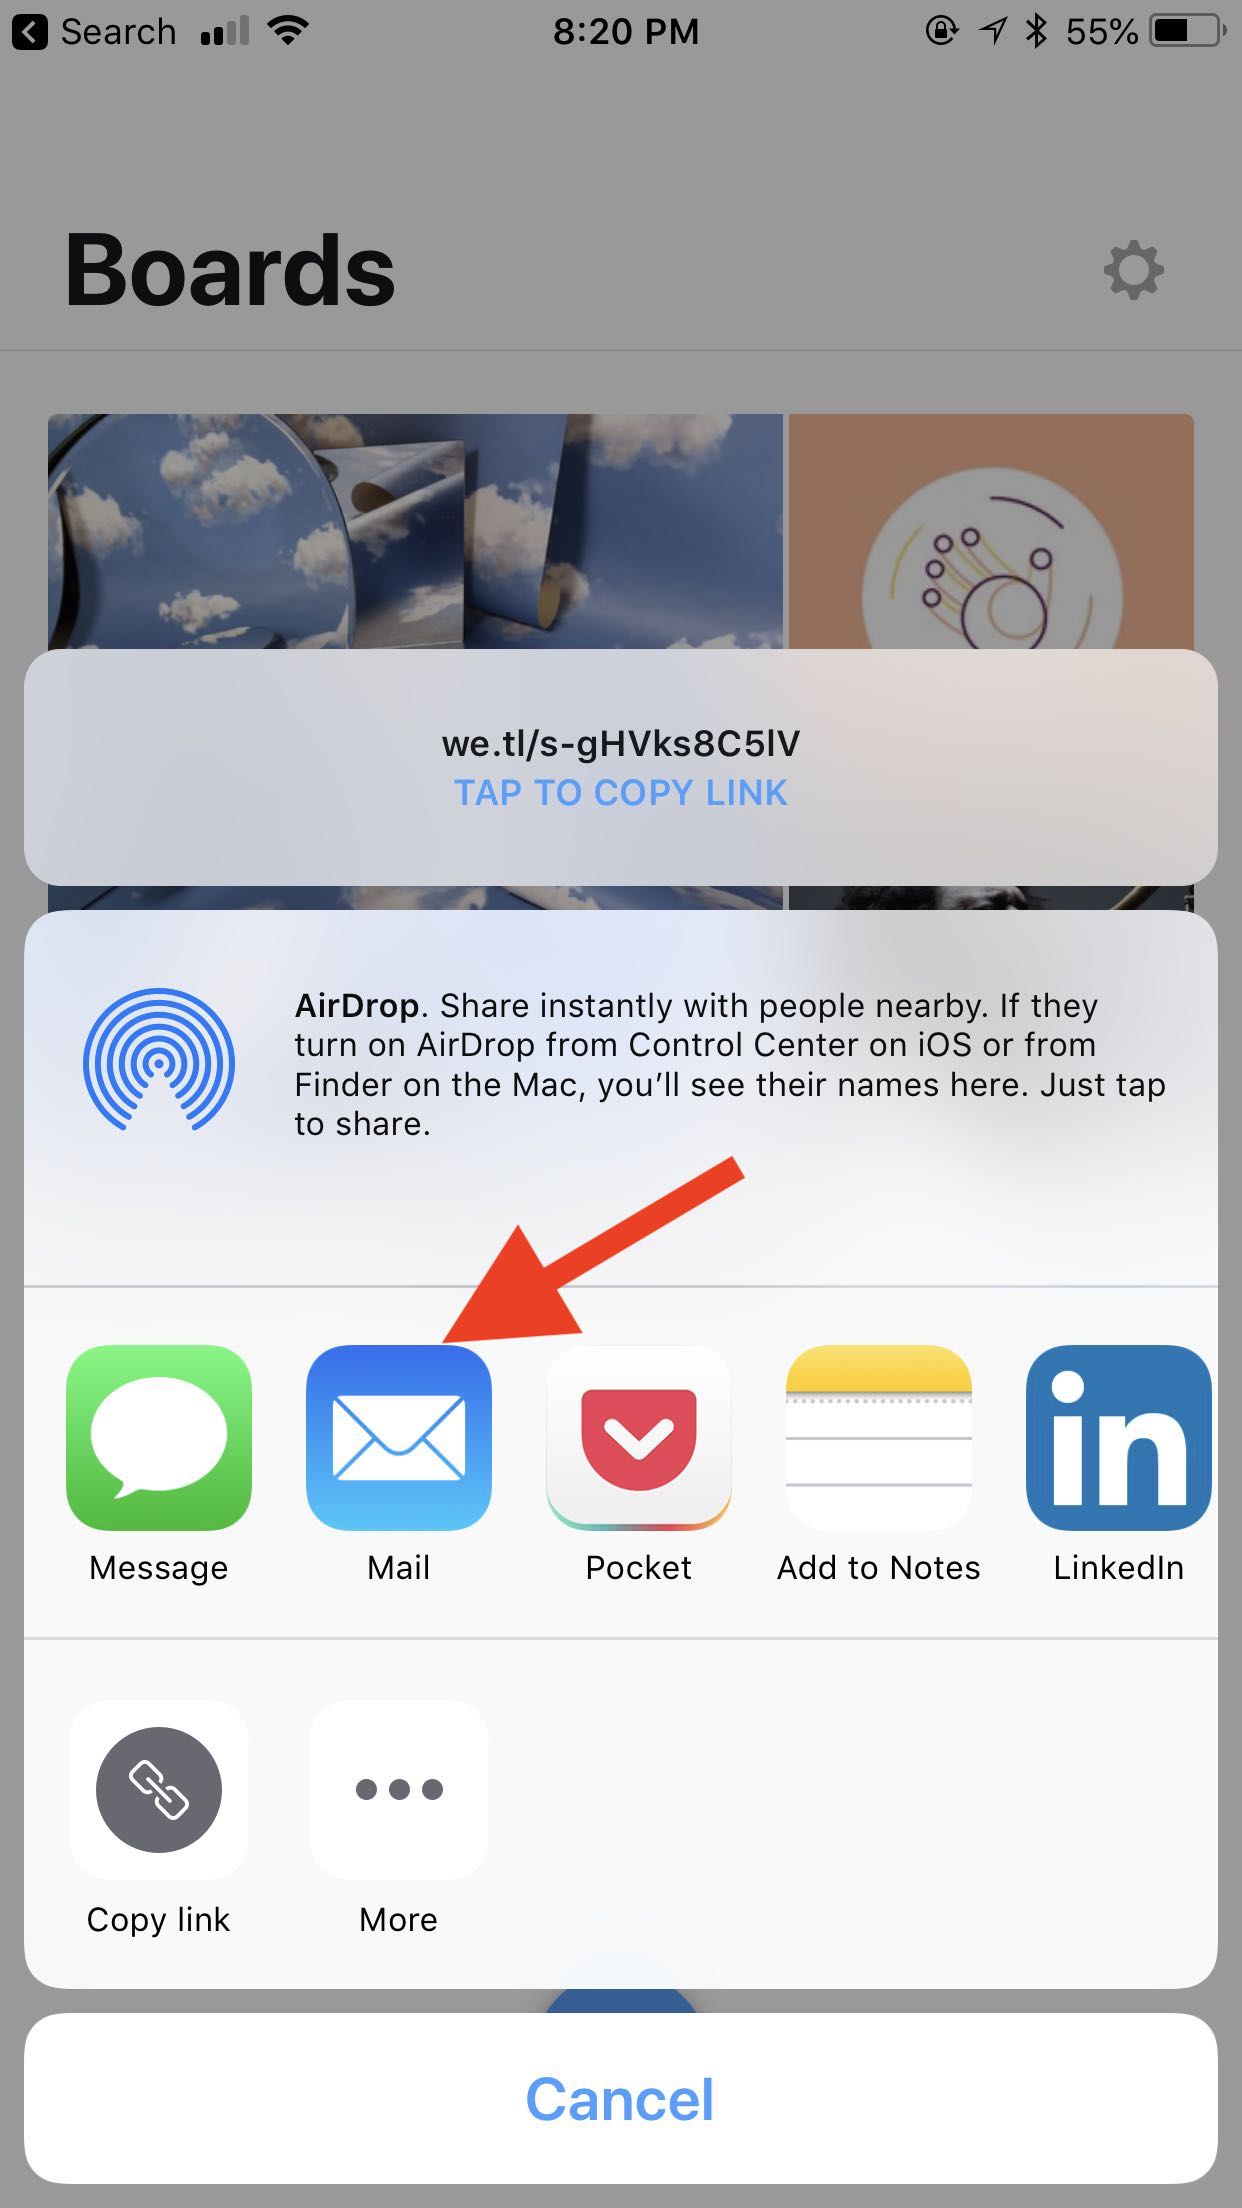
Step 3D - Tap "Share Now"
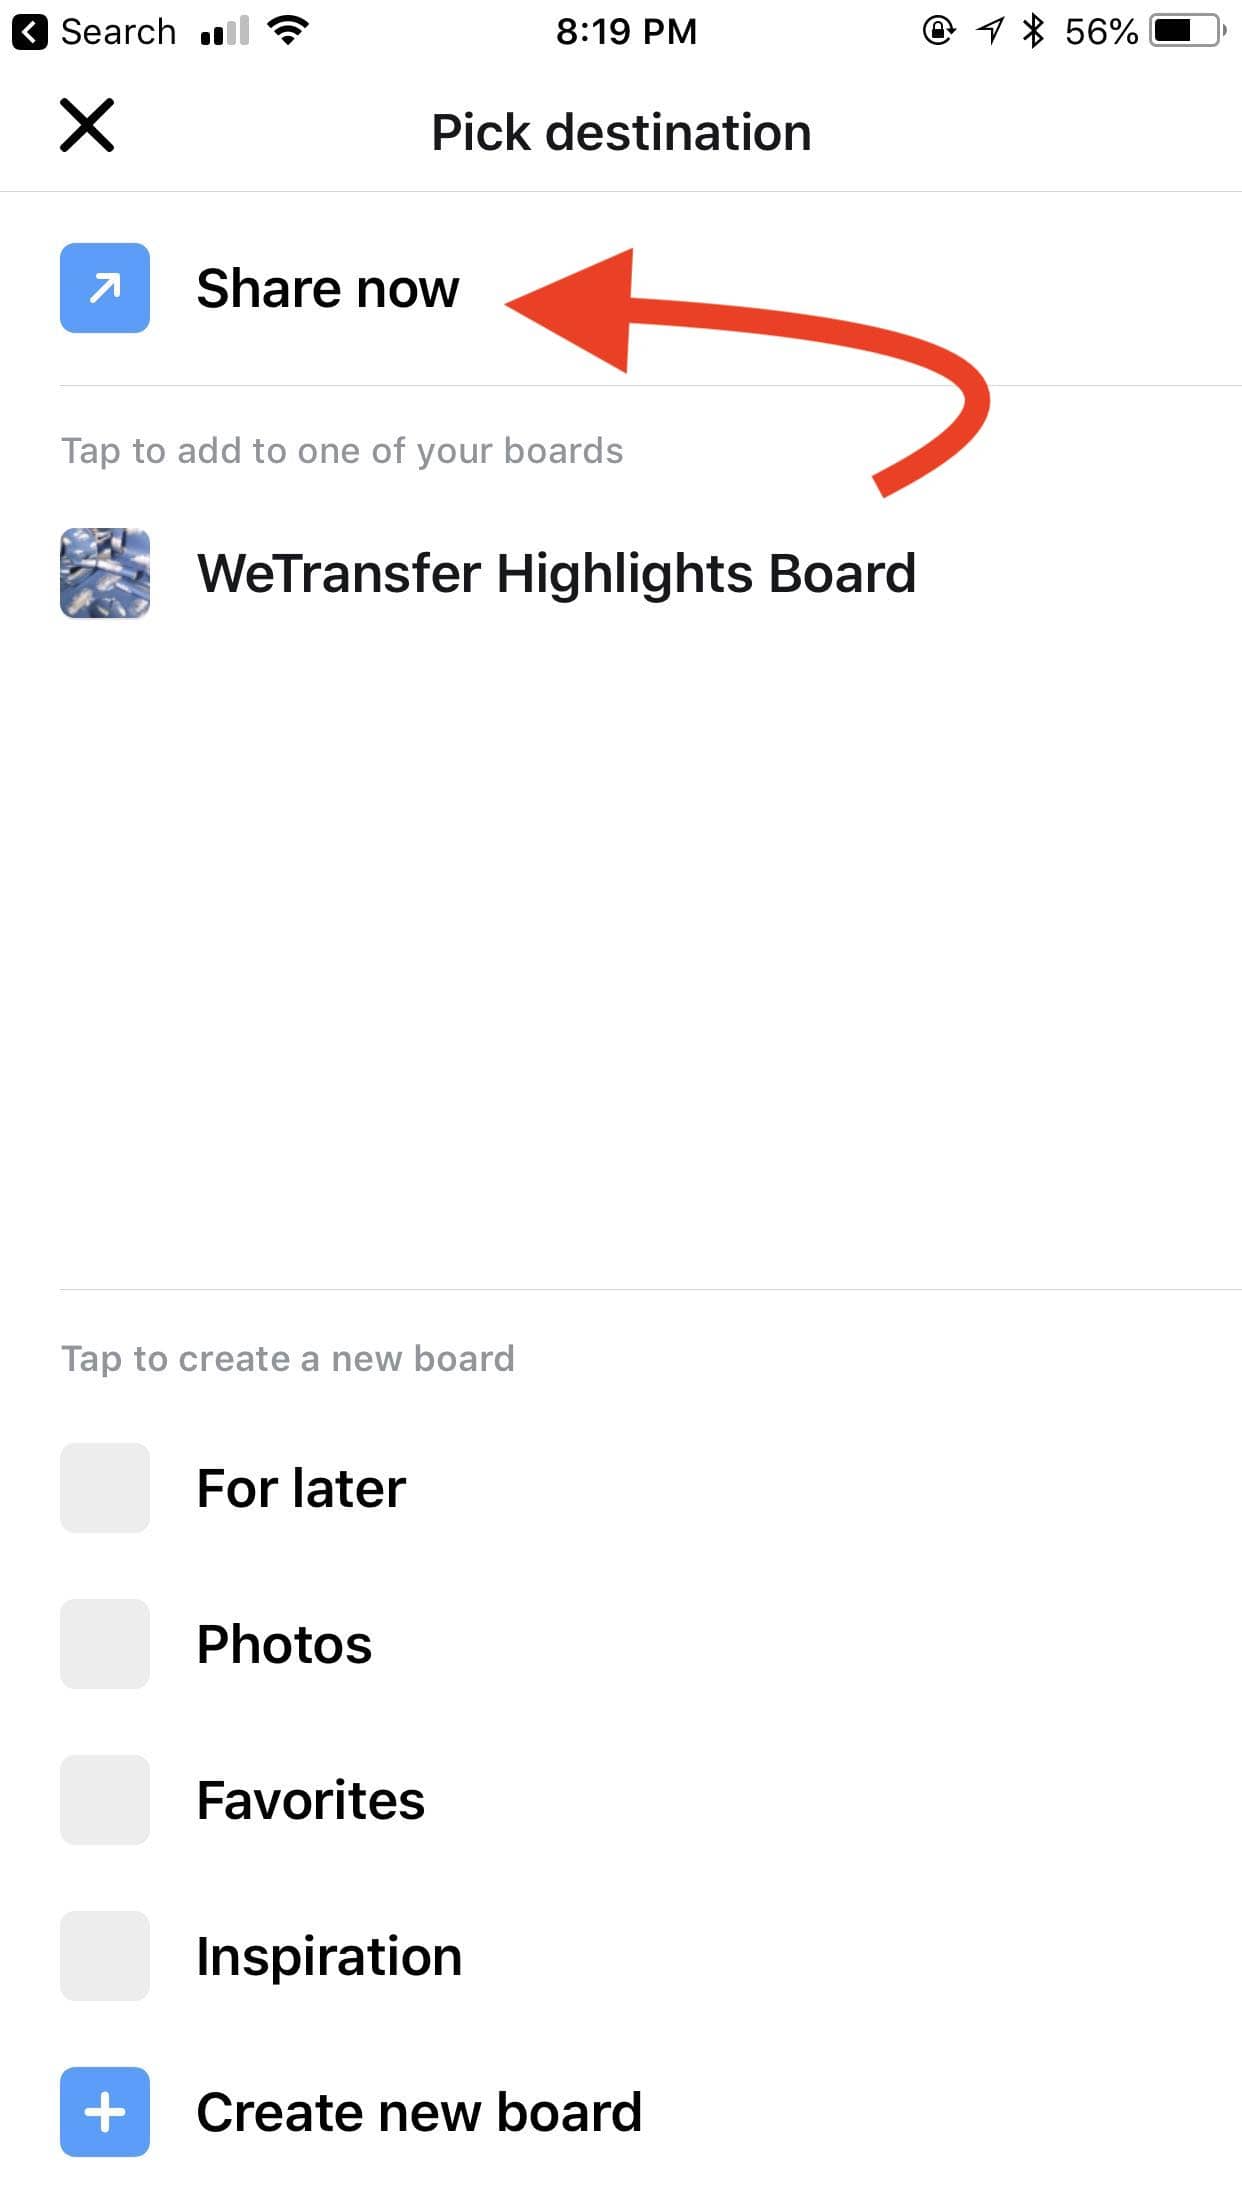
Step 3E - Choose "Mail"
Step 3F - For the email, make sure you send the video to
info@atgmediaworks.com
. Please ensure that your email subject includes a descriptive phrase such as "video for jesse johnson celebration" or "video for Larry Jackson slideshow. " You can then click send.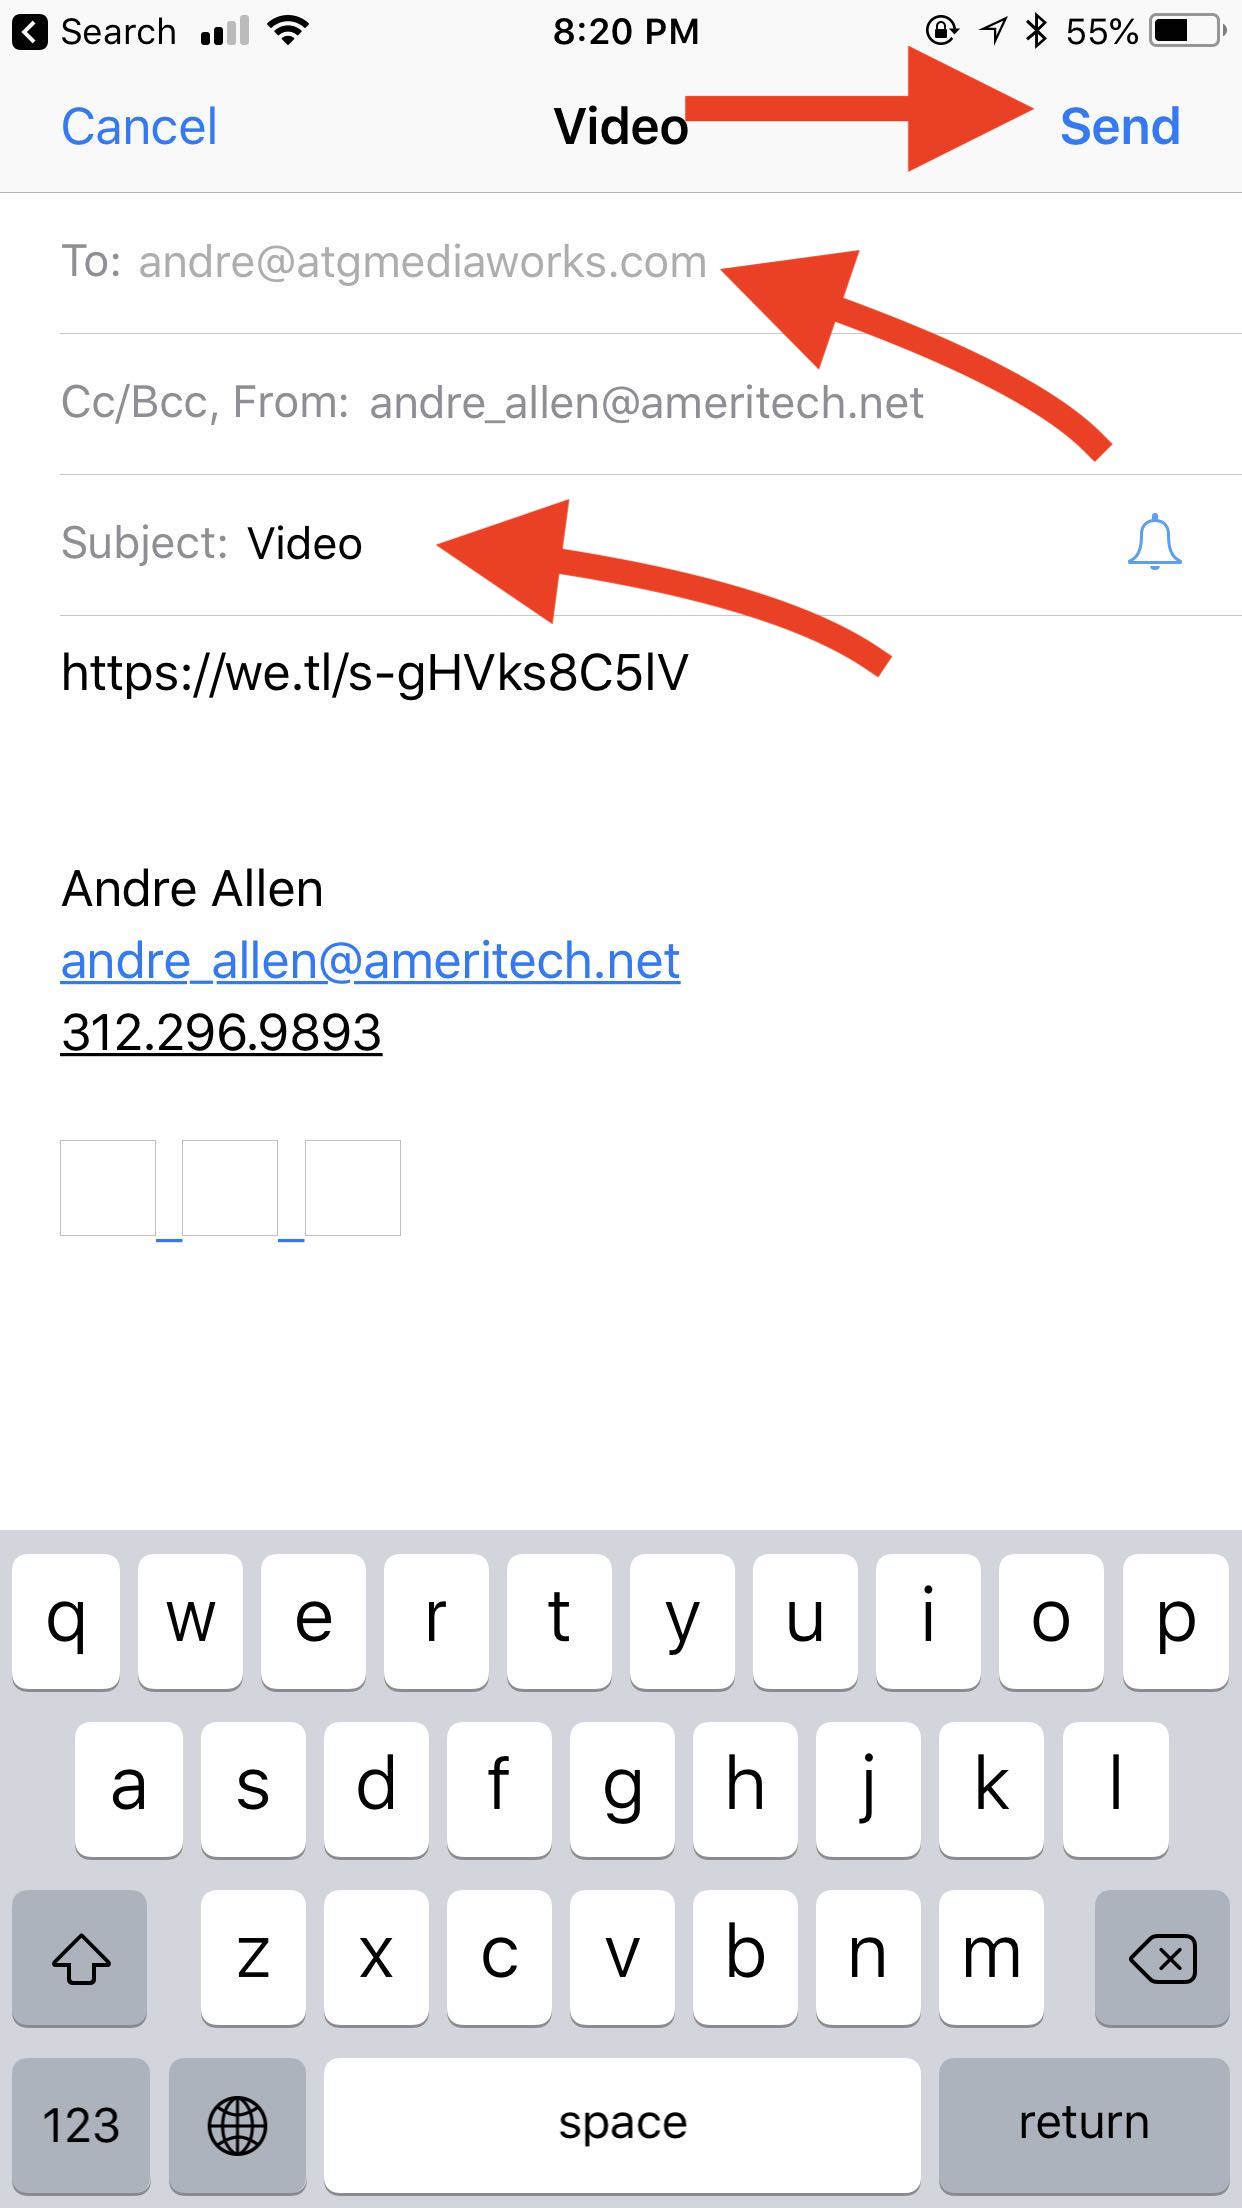
That is it! You can follow up with ATG to ensure your video was received by calling us at (872) 231-2169. Thank you for supporting this project with your video!